Total Pageviews

Friday, December 16, 2011

Carburetor Rebuild...Sounds Hard...Looks Hard...Actually Pretty Easy...

Well, rebuilding of the motor continues.  I finally purchased a carburetor rebuild kit, mostly for the gaskets to remount it to the manifold, but also to replace a few of the parts.  So I watched a few videos online and was a bit intimidated by all the small parts.  In reality, I only used a few of them.  For the most part the difficulty is in making sure all the linkages can go back together and that takes some work.  But for the most part its just a big puzzle and having lots of pictures and diagrams helps.  After some cleaning, it looks much better, and all the parts went back in...so its a matter of it working when I go to start it up when I'm to that point...whenever that will be!  Other recent work includes oil filter and spark plugs.  Next up...fuel pump and distributor...and then I'll pretty much be finished with the motor.  Progress!


Wednesday, November 30, 2011

Motor...T-case and Tranny painted...

Its been a couple of weeks...mostly sorting out my paint situation.  I ordered three products to paint the motor, T-case and transmission...high temperature primer, high temperature metallic silver and high temperature black.  So my first box had the metallic silver...and clear coat...hmmm...I didn't order clear coat.  Called...yep...they sent the wrong thing!  So the primer I didn't get was sent right away.  But...no black paint.  I called...its coming from the east coast warehouse...4 phone calls later and it finally gets sent.  Something about lots of missing paper work.  But...its here and I finally got the drive line painted.  I began by masking the mounting holes with tape and paper so paint would stay outside the motor.  I then primed the everything.  I thought it looked great just in primer!  Its amazing how it looks all cleaned up with a fresh surface.  I followed the primer up with metallic silver on the transfer case and transmission.  They are originally aluminum and never painted...so thought painting them would bring out the shine.  Since I didn't have the black engine paint I decided I would use the frame paint on the engine mounts and the transfer case bracket.  I had to mask the t-case which took some time since I did some intricate work there.  Both turned out great!  Finally my engine paint arrived.  I masked some more and shot a couple coats of black.  AMAZING!  It looks awesome!  I think people will also get a laugh out of my "paint booth."  I hung parts being painted using string and hung them from the roll cage...nothing like improvising.  Next up...getting the engine put back together...


Saturday, November 12, 2011

Engine Cleaning...One Big Messy Job

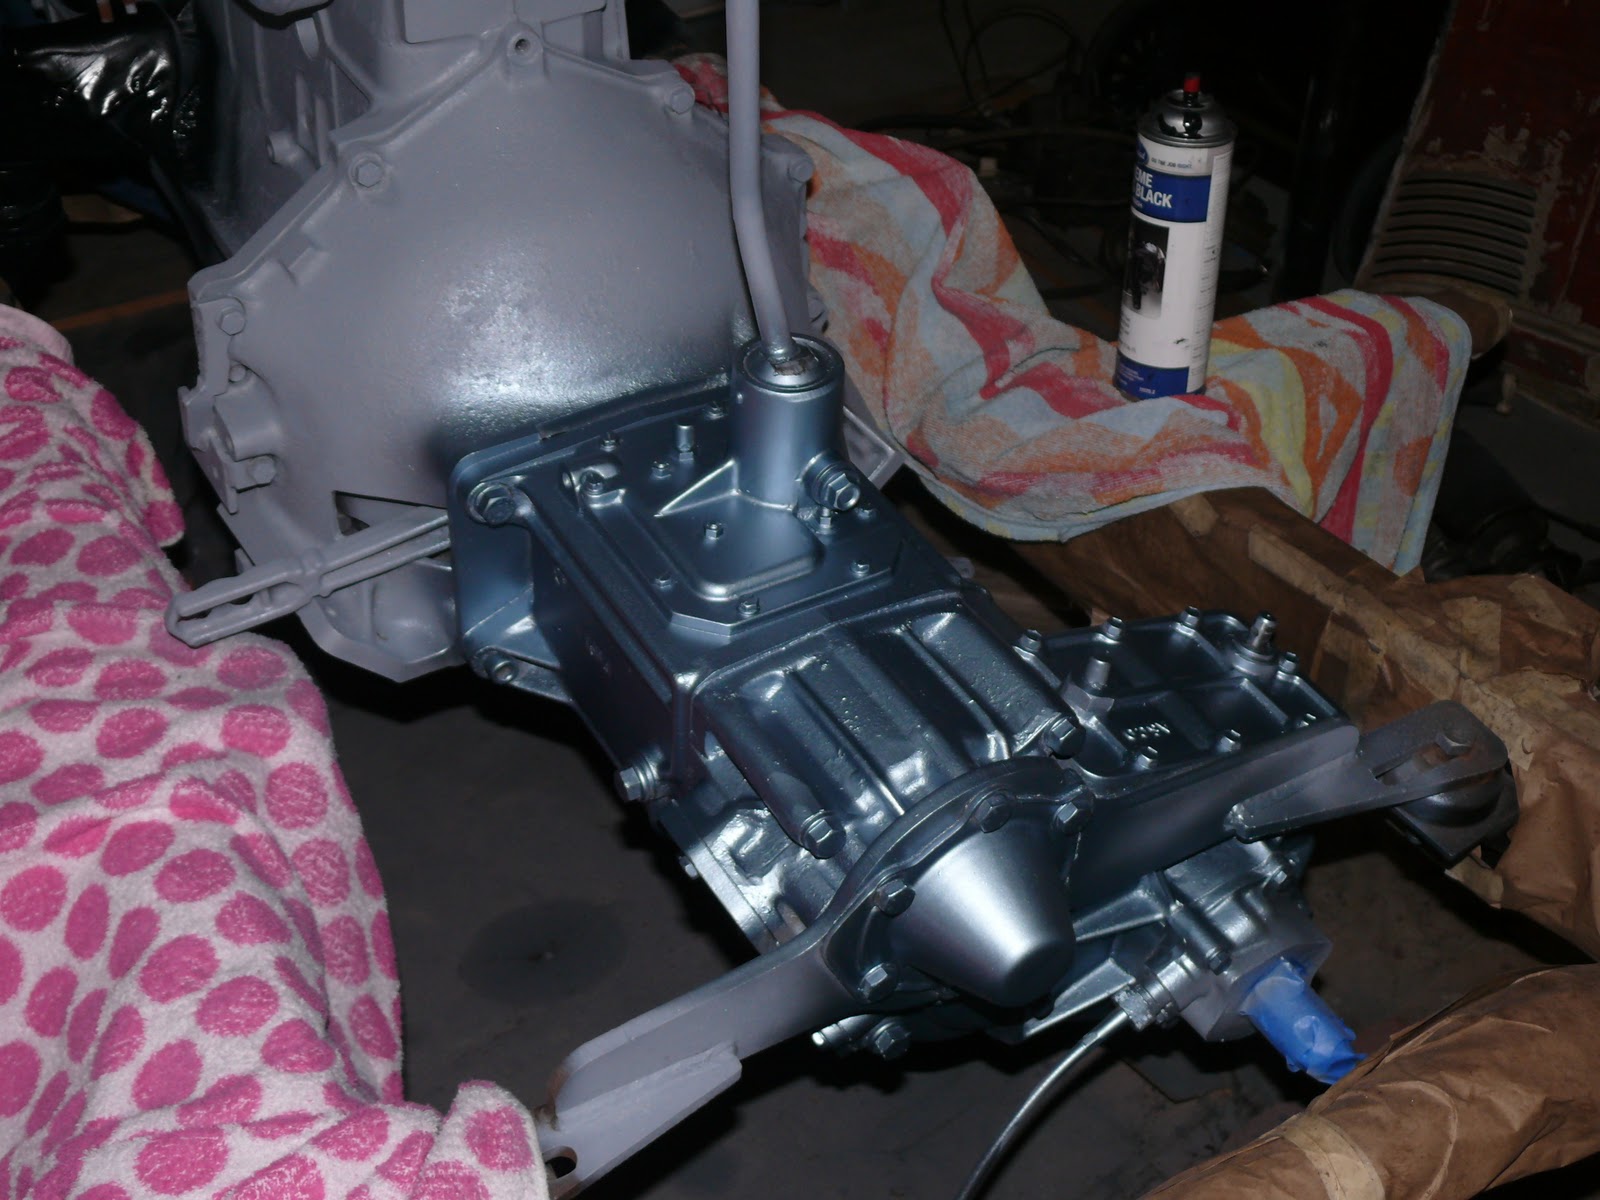
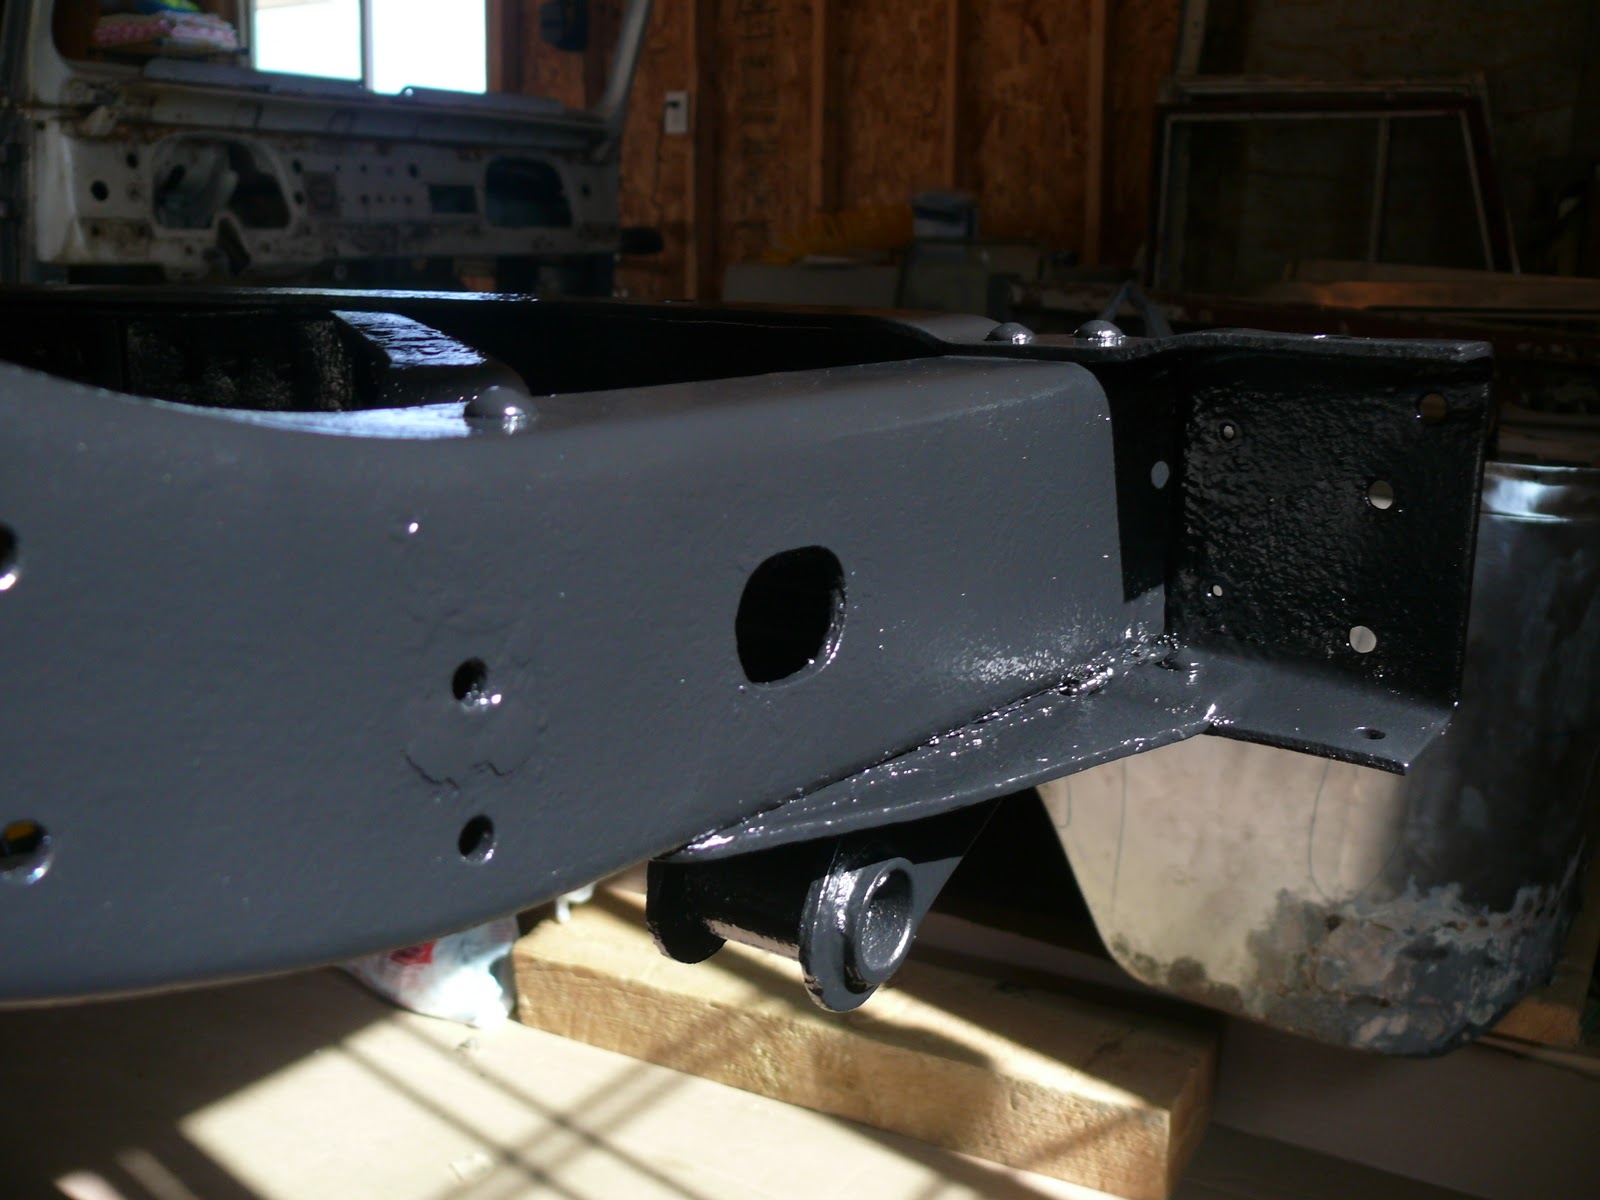
Well the frame is complete...so on to the next item of business...the engine, transfer case and transmission.  I decided to give the mechanicals a good going over...see where they leak, what needs replacing, etc.  For the most part they are in GREAT shape.  The transfer case is a replacement...SOR replacement which means a quality rebuild at some point.  I know using it before the tear down it worked just fine.  Now it looks clean too.  The transmission is the original.  It cleaned up nicely but has lost its silver coloring.  The engine...very messy but very clean now.  I went through about two cans of engine degreaser and several bottles of water...along with several pairs of gloves.  It was tough getting all the little angles and such...but feel it turned out well.  I managed to take most of the workings off the motor so I'll have to replace some seals...no biggie there.  Other things I'll be replacing...all hoses...they were spray painted on!...the belts...the fuel pump and all lines...along with the spark plugs and wires.  So overall it won't be too expensive.  The other thing I will be doing is painting.  I ordered primer...aluminum metallic for the t-case and tranny...and satin GM black for the motor and bell housing.  I wanted something generic so I could paint the car any color and it would go with it.  I think it will look great! 

I also received my bumperettes in the mail this week.  On my way back through Springs...I stopped and picked up some stainless steel hardware...and now have them mounted up.  Man do they look great!  Got a good deal on them too! 

I also managed to get the parking brake off the t-case...and now know why it never worked.  The rear seal on the drive shaft leaked out...and the whole parking brake assembly was filled with fluid and grime.  So I guess I will be ordering a rebuild kit for the brake which includes the t-case seal...and hopefully it will work when I'm done! 


Tuesday, October 25, 2011

Frame 95% of the way done

Been a busy last week out in the garage.  My goal was the get all but where the jack stands are sitting done on the frame before the cold weather hits.  Mission accomplished!  All that is left on the frame is the very front corners and a cross member behind the transmission.  Not much work left at all on the frame.  And let me tell you...it looks amazing...doesn't even look like the same frame!  Amazing what the work looks like when you're finished.  In other news...I borrowed a nice long breaker bar this week and managed to get all but 2 lug  nuts off.  It wasn't an easy task...they were frozen on pretty good.  The last two are ones that I mangled awhile back and will most likely need to be ground off.  But that means as soon as the frame is done, I can jump into the axles.


Friday, October 21, 2011

Frame Rear End

So the past couple of weeks have been pretty busy.  I have spent most of my time working on the frame and getting it prepped for paint.  Well...success!  At least for the rear end so far.  I've been using the Eastwood chemical process to mitigate rust and apply paint.  Basically here is the process...sand the frame (you've already seen that), clean the frame of contaminants using PRE, apply a rust convertor, apply a rust encapsulator and finally a high resin frame paint.  The application process is very easy.  The PRE...you use a foam brush to brush it on...followed by a clean rag to wipe it off.  Foam brushes are also used for the rust convertor and encapsulator while the frame top coat is sprayed on.  Its amazing the difference of what it looked like before I started and the finished product.  Can't wait to get the rest of the frame complete!  The other thing I did was use the rust convertor and encapsulator in one that goes on the inside of the box frame where it is boxed in.  Overall I don't know how much it will help...but at least its some protection from the inside.  We'll see.


Thursday, September 29, 2011

Broken Bolts are Out

Well I'm one step closer to getting the frame ready for paint.  I had about 10 broken and rusted bolts in the frame I had to get out.  I wasn't having any luck with my drill bits...broke a bunch of them.  So a quick post to the Landcruiser club forum landed me with left handed bits...and they came out quick.  So all the broken bolts are out of the frame...and I have to remember that trick when I start on the body (whenever that will be!).  I've also been working on getting the leaf springs off the axles...3 down and one stubborn one to go.  I have it soaking in fluid so hopefully tomorrow I'll get them to start turning.  The other took some work, but did break free easier than I thought they would.  The main trouble I ran into was the bolt plates had been hit by rocks and really limited wrench space...and rubbed the nuts on the u-bolts.  But those I managed to get off.  So...plan for tomorrow...finish sanding the frame...sand blast what I couldn't sand and finalize things for paint.  Time to order supplies!


Wednesday, September 21, 2011

Suspension is Out

Its been a few very productive days with the nice weather.  I have the frame almost completely ready for paint prep.  The past few days have consisted of sanding the frame down and removing any last removable pieces.  This included the front and rear drive shafts...which ended up being a lot easier than I anticipated.  Both came out relatively easy...although there wasn't much room for wrenches on the front.  But they are out!  Next up came the tough task of removing the leaf springs and axles.  Managing where to put jack stand was a big test, but in the end worked out pretty well.  Taking out the shackles and leaf pins was a different story.  The pins actually weren't too bad.  The rear spring pins were rusted out and completely stripped of threads.  I was finally able to cock-eye the bolts and force them out.  The shackles though...they didn't want to budge.  In the end I brought out the 3 lb hammer and gave them a few good whacks and they finally came out minus the bushings.  The bushings ended up being rusted to the spring hangers and it took some work to pry them out...but I finally did.  So...now the things left before paint prep...drill out the broken bolts...sand blast the areas I couldn't sand with the sander/wire wheel...and then its on to chemical rust treatment!


Monday, September 12, 2011

Working on the Frame

Well its been one hot summer...and yard work has mostly consumed my time...but I finally have had some cooler weather!  I have been out a time or two this summer to work on the Cruiser...but haven't made much headway.  So the past few days I've been out several times to finally do some work!  Lately I've been preparing the frame for paint.  I have it mostly sanded and should finish up soon with the wire wheel...and buy some aluminum oxide to media blast the areas I couldn't get the drill into.  I'll also have some grinding to do in some places where the rust has pitted the frame badly...luckily its not in too bad of shape so that work will be minimal.  Its amazing the difference sanding the rust makes.  I can't believe how much of the factor frame paint is still on the inner frame rails!  I do have a few things left to remove...the axle bumpers...the radiator and I've decided to replace the front bumper (has had the corners bent out and it is dented pretty badly and I don't think I can fix it).  Otherwise the leaf springs are ready to come off and rust treatment can begin...hopefully this cooler weather will stick around!

In other news...I did some research on the Cruiser...things were not adding up as far as how things were put together and the date on the VIN.  The VIN has a production date of Dec 1970.  Well there are 3 versions of Landcruiser...the early years which went through July 1970...the middle year...July 1970-end of 1971...and after 1971 basically.  Mine given the VIN date would fall in that middle year which has a different setup than the earlier or later years...and there are more replacement parts for the earlier and later models.  The parts for the middle year are also more expensive!  Well my brake lines and single barrel master brake cylinder match up with the early year which threw up a red flag and had me scratching my head.  Well...I found a place to look up the VIN...which had matching frame and VIN tag numbers...and the production date was Dec 1969!  So the best I can figure is that it is a 1970 model year that was produced in 1969.  That also means cheaper replacement parts and more readily available parts! 

Here are some of the before and after frame shots...pretty amazing the difference...